
How to Remove Bathroom Mould: A Complete Guide to Cleaning and Prevention
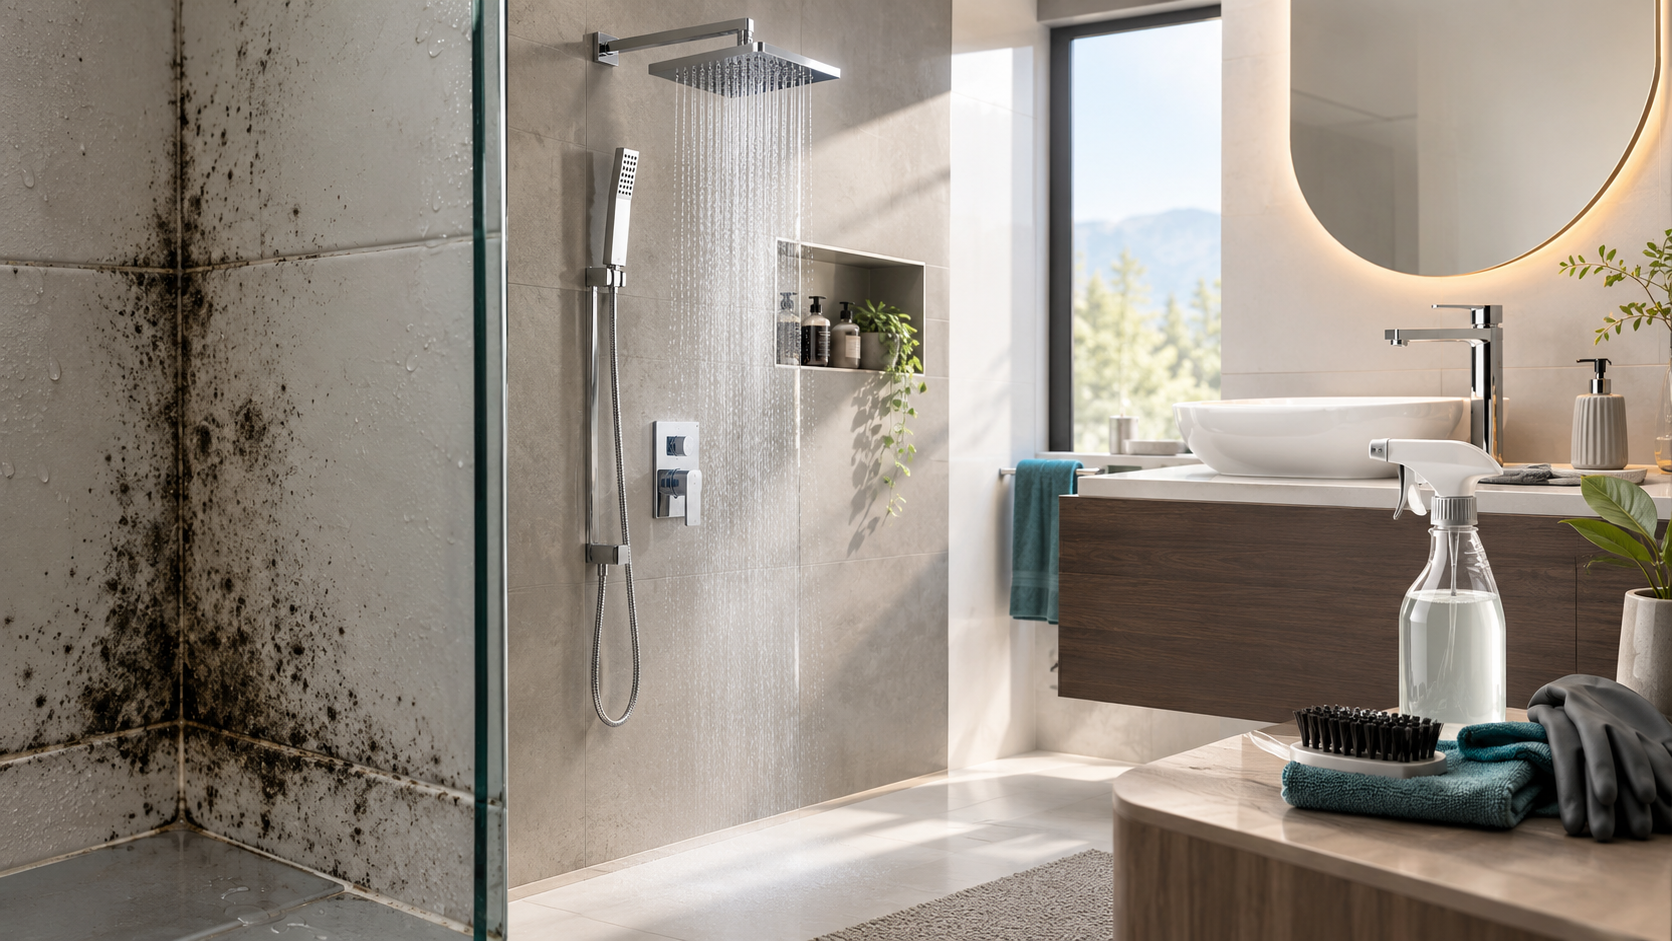
Bathroom mould is a common problem in homes across the UK. Warm showers, baths, condensation and limited ventilation can create conditions in which mould develops on walls, ceilings, grout, silicone sealant and other damp surfaces. Even a well-designed bathroom can experience mould if moisture is allowed to accumulate without adequate ventilation or drying.
Knowing how to remove bathroom mould involves more than cleaning the visible marks. It is important to understand why mould develops, choose a suitable cleaning method for each surface and address the underlying moisture problem to reduce the likelihood of it returning.
This guide explains how to remove mould from different bathroom surfaces, how to prevent black mould from developing around showers and baths, and how to maintain bathroom fittings without damaging their finishes. It also covers the signs that indicate a persistent damp problem may require professional attention.
What Causes Bathroom Mould?
Bathroom mould develops when moisture remains on surfaces or in the surrounding environment for extended periods. Bathrooms are particularly susceptible because bathing and showering release water vapour into the air, while splashes and leaks can leave surfaces persistently damp.
Several factors can contribute to mould growth.
1. Condensation on walls and ceilings
When warm, moisture-laden air comes into contact with a cooler surface, water droplets can form. This process, known as condensation, is especially noticeable on bathroom mirrors, windows, external walls and ceilings after a hot shower.
If the moisture does not evaporate or get removed, repeated condensation can leave surfaces damp enough for mould to develop.
2. Poor ventilation
Bathrooms need an effective way to remove humid air. Without sufficient ventilation, moisture can remain in the room long after someone has finished bathing.
An extractor fan that does not work properly, inadequate airflow or limited opportunities to open a window can all contribute to the problem.
3. Water trapped around seals and joints
The edges of a bath, shower tray, basin and shower enclosure can collect water during everyday use. Silicone sealant and grout joints may remain damp if water is not removed and the room does not dry adequately.
Mould may become visible as dark spots along these joints. If the sealant has deteriorated, cracked or separated from the adjoining surface, water may also penetrate behind it.
4. Persistent leaks
Leaking pipes, dripping fittings, damaged shower connections and defective seals can keep an area wet even when the bathroom is not being used.
Mould that repeatedly appears in the same location may indicate that moisture is coming from behind a surface rather than from condensation alone.
5. Damp materials and surfaces
Dust, soap residue and other deposits can accumulate on damp surfaces. Combined with prolonged moisture, these conditions can encourage mould growth.
Regular cleaning helps remove residue, but it cannot compensate for a continuing leak or inadequate ventilation.
The key principle: Removing visible mould is important, but the moisture source must also be addressed. Otherwise, the problem may return even after the affected area has been cleaned.
How to Remove Bathroom Mould Step by Step
The correct method depends on the affected surface, the extent of the mould and the product being used. A cleaning method that is suitable for a hard, washable surface may damage silicone, painted finishes, natural stone or bathroom fittings.
Follow these steps before starting.
Step 1: Identify the affected area
Inspect the bathroom carefully and identify where the mould is appearing. Common locations include:
-
Ceiling corners and areas above the shower.
-
Painted walls and window surrounds.
-
Grout between wall and floor tiles.
-
Silicone sealant around baths and shower trays.
-
Corners of shower enclosures.
-
Areas behind bathroom furniture.
-
Spaces around basins, taps and pipe connections.
Look for associated signs of dampness, including peeling paint, bubbling finishes, persistent water droplets, damaged grout or a musty smell.
If the mould is extensive, keeps returning or appears to be associated with water penetrating the building fabric, arrange a suitable professional assessment rather than relying on surface cleaning alone.
Step 2: Improve ventilation
Before cleaning, ventilate the room where possible and safe to do so. Open a window if conditions allow and use a functioning extractor fan to help remove moisture from the air.
Read the cleaning product's instructions and follow its precautions, including any requirements for protective gloves, eye protection or respiratory protection.
Keep children and pets away from the cleaning area as directed by the product manufacturer.
Step 3: Choose a suitable mould cleaner
Use a cleaning product specifically intended for the affected surface and type of mould. Read the label carefully and follow the stated application method, contact time and rinsing instructions.
Do not assume that a product suitable for tiles is also suitable for chrome-plated taps, coloured fittings, silicone sealant, painted ceilings or natural stone.
Never mix cleaning chemicals. In particular, combining bleach with acidic cleaners or ammonia-containing products can release dangerous gases.
Step 4: Clean the affected surface gently
Apply the selected product according to its instructions. Use a suitable soft cloth or non-abrasive cleaning tool where the surface permits it.
Avoid aggressive scrubbing that could damage grout, scratch a finish or weaken a seal. For bathroom fittings, follow the manufacturer's specific care guidance rather than applying a general-purpose mould remover directly to the product.
Step 5: Rinse and dry as instructed
Where the product instructions require rinsing, remove the residue thoroughly. Dry the cleaned area using a suitable cloth or allow it to dry as directed.
Do not leave cleaning chemicals on the surface longer than recommended. Residue can damage some materials and finishes.
Step 6: Address the underlying cause
Once the area has been cleaned, investigate why it became damp. Check the ventilation, look for persistent condensation and inspect visible seals and plumbing connections.
If water is entering through a damaged joint or a leak, arrange repairs. If condensation is the main cause, improve moisture extraction and make drying the bathroom part of the regular routine.
How to Remove Black Mould from Bathroom Silicone Sealant
Black marks around bath edges and shower trays are among the most noticeable bathroom mould problems. Silicone sealant is used to create a flexible joint between adjoining surfaces, helping prevent water from entering gaps.
However, sealant can develop mould when moisture and residue remain around the joint.
Can black mould be removed from silicone?
Surface mould may be removable if it has not penetrated deeply into the material. Use a mould treatment specifically labelled as suitable for silicone and follow the manufacturer's instructions.
Before applying any cleaner, confirm that it is compatible with the sealant and the surrounding bath, shower tray, tiles or other materials.
Avoid using abrasive pads or sharp tools that could cut the silicone or separate it from the adjoining surface.
When should silicone sealant be replaced?
Cleaning may not restore sealant that has become deeply discoloured, deteriorated or damaged. If black staining remains within the material, or if the seal has begun to crack, peel or separate from the surface, replacement may be necessary.
A damaged seal can allow water to reach concealed areas, potentially contributing to more extensive dampness.
Before resealing, the underlying cause of the moisture should be addressed. The old sealant must be removed appropriately, and the joint should be prepared and dried according to the instructions for the replacement product.
If you suspect water has penetrated behind the bath or shower tray, investigate the issue before applying new sealant over the affected area.
How to prevent mould around silicone joints
After bathing or showering, remove standing water from the surrounding surfaces. Keep the area ventilated and allow the joint to dry between uses.
Regularly inspect the sealant for cracks, gaps and changes in appearance. Prompt attention to damaged joints can help prevent a minor maintenance issue from becoming a more extensive repair.
How to Remove Mould from Bathroom Grout
Grout fills the spaces between tiles and can collect moisture, soap residue and dirt. Mould may appear as dark spots or discolouration, particularly in shower areas and other locations that remain wet.
Choose the right cleaning method
Use a grout-compatible mould cleaner and follow the instructions for the particular tile and grout combination.
Apply the cleaner carefully so that it does not damage adjoining materials. Use a soft brush only if permitted by the cleaner and surface manufacturer, and avoid aggressive scrubbing that could erode the grout.
After cleaning, rinse where required and allow the area to dry completely.
What if the mould keeps returning?
Repeated mould growth can indicate that the area is not drying properly or that moisture is entering through damaged grout or adjoining seals.
Inspect the joints for cracks, missing sections or other deterioration. Where the grout has broken down, professional repair or regrouting may be needed.
If moisture is penetrating behind the tiled surface, cleaning the visible grout alone will not resolve the problem.
Regular maintenance, effective ventilation and drying the shower area after use can help reduce the conditions that encourage mould to return.
How to Remove Mould from Bathroom Walls and Ceilings
Mould on walls and ceilings often appears as scattered black, grey or dark green patches. It may develop around windows, in ceiling corners, above showers or on colder external walls.
The appropriate treatment depends on the surface material and the condition of the paint or plaster.
Painted walls
For a washable painted surface, use a mould treatment suitable for that finish. Follow the instructions carefully and test compatibility in an inconspicuous area where recommended.
Avoid soaking the wall or scrubbing so aggressively that the paint begins to lift.
If the paint is bubbling, peeling or soft, the problem may extend beyond surface mould. Identify the source of moisture before considering repainting.
Bathroom ceilings
Ceilings can accumulate condensation, particularly when warm air rises and ventilation is insufficient.
For small areas on a sound, washable surface, a suitable mould treatment may help remove visible growth. However, a mouldy ceiling should be assessed carefully if the plaster is damaged, the surface remains damp or the staining repeatedly returns.
Do not simply paint over mould. The affected area needs appropriate treatment, and the underlying moisture problem must be corrected.
If the ceiling shows signs of a leak from the room above, damaged plaster or extensive mould growth, seek professional assistance.
Wallpaper and porous materials
Porous materials can be more difficult to clean thoroughly than hard, washable surfaces. Mould may penetrate the material, making surface treatment insufficient.
Where wallpaper, plasterboard, ceiling tiles or other absorbent materials have extensive mould contamination or water damage, a professional assessment may be necessary to determine whether cleaning or replacement is appropriate.
How to Remove Mould from a Shower Enclosure
Shower enclosures are exposed to frequent splashes, water droplets and soap residue. Mould can develop around seals, corners, lower edges and areas where water collects.
The best cleaning approach depends on whether the affected surface is glass, metal, silicone, tile or another material.
Cleaning shower glass
Use a glass cleaner suitable for the enclosure and follow the manufacturer's instructions. Remove water and soap residue regularly with a suitable cloth or glass-cleaning tool.
Avoid abrasive pads that may scratch the surface or damage any special coating.
After showering, wiping the glass and allowing the enclosure to dry can reduce the accumulation of moisture and residue.
Cleaning enclosure frames and fittings
Frames, hinges, handles and other fittings may have different finishes and cleaning requirements.
Use only products approved for the relevant materials. A cleaner that is suitable for glass may not be suitable for a plated metal component or a coloured finish.
Pay particular attention to joints and corners, where water may remain trapped.
Maintaining seals
Inspect the silicone joints and enclosure seals for mould, deterioration and gaps. Clean suitable surfaces gently and ensure that the enclosure dries between uses.
If a seal is damaged or no longer prevents water from escaping, arrange an appropriate repair.
For bathrooms being updated or redesigned, explore the shower enclosure collection to consider how the shower area fits into the wider bathroom layout.
How to Remove Mould from Bathroom Taps and Fittings
Bathroom taps, shower fittings and accessories require particular care because their finishes can be damaged by unsuitable cleaning products.
Mould or dark residue around a fitting may originate from the surrounding silicone, grout or accumulated dirt rather than from the metal surface itself.
Clean taps without damaging the finish
Start by identifying the material and finish of the fitting. Use a soft, damp cloth and a mild cleaning solution only where permitted by the manufacturer's instructions.
Avoid abrasive scouring pads, aggressive scrubbing powders and harsh chemicals that may dull or damage the surface.
For chrome-plated products, follow the specific care guidance provided by the manufacturer. Jaquar's product maintenance guidance recommends gentle cleaning and warns against abrasive mould and mildew removers on relevant fittings.
If the mould is located around the base of a tap, inspect the surrounding joint and remove suitable surface residue without allowing an incompatible cleaner to contact the fitting.
Explore the bathroom and basin taps collection when planning fittings for a bathroom renovation.
Cleaning showerheads and controls
Showerheads, controls and exposed fittings can collect water deposits and soap residue. Clean them using methods approved for the particular product and finish.
Do not assume that a treatment suitable for one showerhead can be used on every model. Special coatings, rubber nozzles and other components may have specific maintenance requirements.
Where a shower fitting is leaking or a connection remains wet, address the fault rather than repeatedly cleaning the surrounding area.
Protect finishes during mould removal
The most important precaution is to keep cleaning products appropriate to the surface.
Do not apply a general-purpose mould remover indiscriminately to taps, plated components, coloured finishes, shower controls or other bathroom fittings. Follow the product's care instructions and rinse or dry the surface as directed.
For further guidance, consult the Jaquar UK website and the maintenance information supplied with the specific fitting.
How to Prevent Bathroom Mould from Returning
Once visible mould has been removed, a consistent maintenance routine can help prevent moisture from accumulating again.
1. Use the extractor fan effectively
Run the bathroom extractor fan during showering and for an appropriate period afterwards, following the fan manufacturer's instructions.
If the fan is noisy, ineffective or not removing moisture, check whether maintenance or repair is required.
A functioning extractor fan helps remove humid air, but it must be suitable for the room and installed and maintained correctly.
2. Open windows where possible
Opening a bathroom window after bathing can help release humid air when conditions allow.
This should complement, rather than replace, adequate ventilation. In bathrooms without windows, an appropriate mechanical ventilation system becomes particularly important.
3. Remove standing water
Use a suitable cloth to wipe water from the bath edges, shower tray, glass and other surfaces after use.
Pay particular attention to corners and horizontal surfaces where droplets can collect.
This simple habit helps reduce the time surfaces remain wet.
4. Keep seals and grout in good condition
Inspect the joints around baths, basins and shower enclosures periodically. Look for gaps, cracks, peeling silicone and damaged grout.
Arrange repairs when necessary, especially where water could reach concealed parts of the bathroom.
5. Dry towels and bath mats
Wet towels and bath mats can contribute to moisture in a poorly ventilated room. Hang towels so that air can circulate around them and allow bath mats to dry between uses.
Avoid leaving damp fabrics bunched together or on surfaces where they cannot dry properly.
6. Maintain a consistent cleaning routine
Regularly remove soap residue, dust and water deposits from surfaces. Clean the bathroom before substantial grime accumulates, and use products appropriate to the material being cleaned.
A short, regular maintenance routine is often easier to manage than waiting until visible mould has spread.
7. Address leaks promptly
Check visible plumbing connections, taps, shower hoses and seals for signs of leakage.
A persistent drip or damp patch should be investigated. If water continues to enter a wall, floor or ceiling, surface cleaning alone will not prevent mould from returning.
Can Bathroom Mould Be Prevented Through Bathroom Design?
Bathroom design can influence how easily moisture is managed, although no fixture or finish can eliminate mould on its own.
A practical layout should allow sufficient access for cleaning and maintenance. Shower areas should be planned with suitable drainage, appropriate waterproofing and effective ventilation.
Plan the wet and dry areas
A well-considered shower layout helps direct water towards the intended drainage area and reduces unnecessary splashing into surrounding spaces.
Suitable enclosure design, correctly installed seals and appropriate drainage all contribute to managing water in everyday use.
Consider access for cleaning
Fixtures positioned too close to inaccessible corners can make routine cleaning more difficult. When planning the room, consider how easily the floor, wall junctions and areas around the sanitaryware can be reached.
Wall-mounted products may create more accessible floor space in some layouts, but the installation must still provide suitable access to concealed components.
Choose products with appropriate care requirements
Different materials and finishes need different cleaning methods. Selecting products that suit your household's maintenance routine can make ongoing care easier.
For example, bathroom taps and shower fittings should be cleaned according to their individual finish requirements rather than with a single aggressive cleaning product intended for every surface.
Explore the Jaquar UK bathroom collections when planning a coordinated bathroom, and review the care instructions for the products you select.
When Should You Seek Professional Help for Bathroom Mould?
Small amounts of surface mould may be manageable with an appropriate cleaning product and careful attention to ventilation. However, some problems require more than routine cleaning.
Consider professional assessment if:
-
Mould covers a large area or is spreading rapidly.
-
It repeatedly returns despite cleaning and improved ventilation.
-
Walls, ceilings or floors remain damp.
-
Paint is peeling, plaster is deteriorating or materials appear damaged.
-
There are signs of a leaking pipe, defective seal or water entering from another room.
-
Mould appears behind furniture, inside a concealed space or within a wall.
-
The affected area is extensive or cleaning it safely is difficult.
Do not delay investigating a suspected leak or persistent damp problem. Where mould is extensive, avoid disturbing the affected material unnecessarily and seek appropriate remediation advice.
In rented accommodation in England, tenants should report persistent damp and mould to their landlord or managing agent so that the underlying cause can be investigated and addressed. The response should not be limited to removing the visible staining.
Frequently Asked Questions About Bathroom Mould
What is the fastest way to remove bathroom mould?
The appropriate method is to use a mould treatment suitable for the affected surface, follow its instructions and allow the area to dry. The underlying cause of the moisture must also be addressed to reduce the likelihood of recurrence.
How do I remove black mould from silicone sealant?
Use a mould cleaner specifically approved for silicone and the surrounding materials. Follow the product instructions and avoid abrasive tools. If the staining has penetrated the sealant or the joint is damaged, replacement may be necessary.
Why does mould keep coming back after cleaning?
Recurring mould often indicates that the underlying moisture problem has not been resolved. Poor ventilation, repeated condensation, leaks and damaged seals can all contribute. Investigate the source rather than relying on repeated surface treatment.
Can I use bleach to remove bathroom mould?
Do not assume bleach is suitable for every bathroom surface. Some materials and finishes can be damaged by it, and bleach must never be mixed with other cleaning chemicals. Use a product specifically suitable for the affected surface and follow its safety instructions.
How do I remove mould from bathroom grout?
Use a grout-compatible mould cleaner according to the label, and avoid scrubbing aggressively enough to damage the joints. If the grout is cracked or deteriorating, repair may be required. Persistent dampness should also be investigated.
Does a bathroom extractor fan prevent mould?
An appropriately selected and functioning extractor fan helps remove humid air and can reduce condensation. However, it cannot correct every moisture problem, particularly leaks or water entering through damaged building materials.
How often should I clean my bathroom to prevent mould?
The frequency depends on how often the bathroom is used, the ventilation and how quickly surfaces dry. Regular cleaning, wiping away standing water and periodic inspections of seals and grout can help prevent moisture and residue from accumulating.
Can mould damage bathroom fittings?
Persistent moisture can affect surrounding materials, while unsuitable mould removers may damage plated, coloured or other specialist finishes. Use surface-appropriate cleaners and follow the care instructions supplied with each product.
Should I paint over bathroom mould?
Painting directly over mould does not address the underlying problem. The mould needs appropriate treatment, and the cause of the moisture must be corrected before damaged surfaces are repaired or repainted.
When should I replace bathroom silicone?
Consider replacing silicone when it is cracked, peeling, detached or persistently discoloured because mould has penetrated the material. Check for water penetration behind the joint before resealing.
Keep Your Bathroom Clean, Dry and Well Maintained
Removing bathroom mould effectively requires a combination of suitable cleaning, regular maintenance and moisture control. The right approach depends on the affected surface, the extent of the growth and the reason it developed in the first place.
Clean small areas carefully with appropriate products, protect delicate bathroom finishes and allow surfaces to dry thoroughly. Pay particular attention to silicone joints, grout, shower enclosures and areas around taps where water can remain trapped.
Most importantly, investigate recurring dampness rather than treating visible mould as an isolated cleaning problem. Effective ventilation, prompt leak repairs and regular inspection of seals can all help reduce the conditions that allow mould to return.
For a bathroom that remains practical and easier to maintain, consider the complete space, from shower enclosures and taps to the surrounding surfaces and ventilation. Explore the Jaquar UK bathroom collection for bathroom design inspiration, and follow the maintenance instructions for each product to help preserve its appearance and finish over time.


