
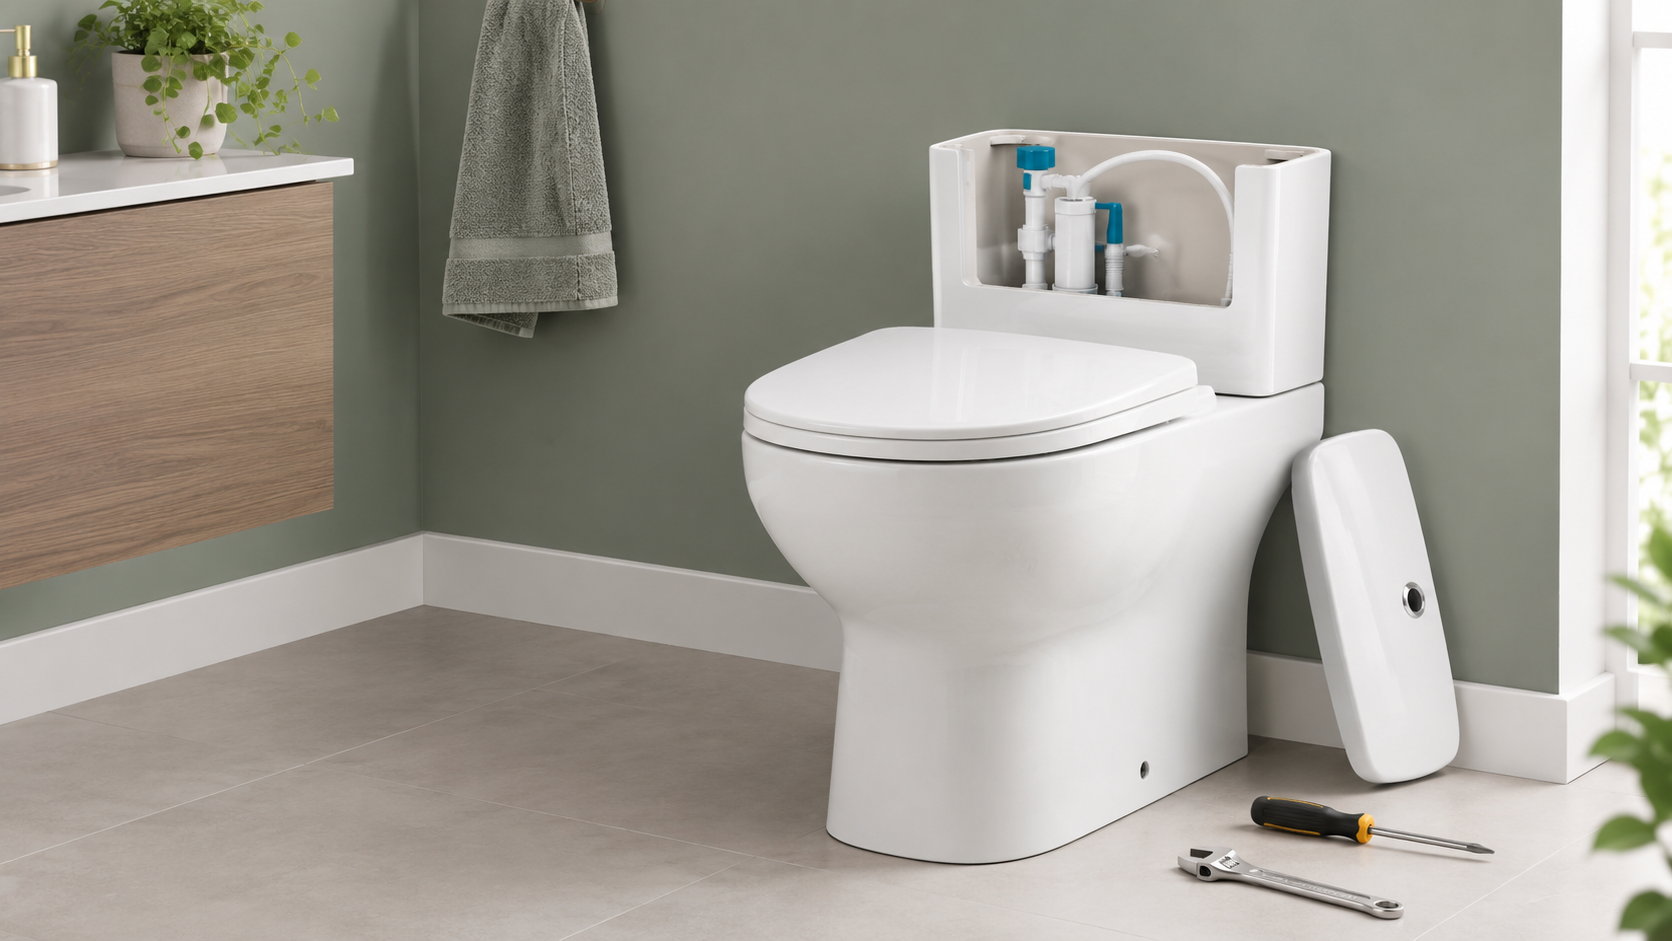
A toilet cistern plays an essential role in how your bathroom functions. It stores the water needed for flushing, controls how much water enters the toilet after each flush, and helps ensure waste is cleared efficiently. When the cistern starts leaking, develops a crack, or no longer works as it should, replacing it may be a practical way to restore reliable performance without necessarily replacing the entire toilet.
Changing a toilet cistern can appear complicated, particularly if you have never undertaken a plumbing task before. However, replacing a standard, exposed cistern with a compatible model is often manageable for someone with suitable DIY skills, the correct tools, and a methodical approach. The key is to identify your existing toilet configuration, choose a compatible replacement, isolate the water supply, and follow the manufacturer's installation instructions carefully.
This guide explains how to change a toilet cistern step by step, from identifying the type of cistern you have to checking the installation for leaks. It also covers common problems, important safety considerations, and situations where it is better to seek help from a qualified plumber.
What Is a Toilet Cistern?
A toilet cistern is the water-holding tank that supplies the water used to flush a toilet. Depending on the design, it may sit directly on the toilet pan, be mounted higher on the wall, or be concealed behind a wall or within bathroom furniture.
Inside the cistern, a fill valve controls the incoming water supply. A float mechanism helps regulate the water level, while the flush valve or siphon releases water into the toilet pan when the flush is activated. Seals and connecting fittings help prevent water from escaping around the cistern and its connections.
Although the cistern may look like a simple tank, several components work together to make each flush function correctly. A fault with one component can cause slow filling, continuous running, weak flushing, or water leaking onto the bathroom floor.
In some cases, replacing a faulty internal component is sufficient. If the cistern body is cracked, badly damaged, or incompatible with replacement parts, changing the complete cistern may be the more appropriate solution.
When Should You Replace a Toilet Cistern?
Not every cistern problem requires a complete replacement. Before buying a new unit, identify the source of the fault and consider whether a repair would be sufficient.
1. The Cistern Is Cracked
A crack in the cistern body can allow water to escape continuously or intermittently. Even a small crack may become more problematic over time, particularly if the cistern is made from ceramic. A cracked cistern should generally be replaced rather than relied on after a temporary repair.
2. Water Is Leaking from the Cistern
Water around the cistern may indicate a worn seal, loose connection, damaged inlet fitting, or a problem with the joint between the cistern and toilet pan. If the cistern itself is intact, replacing a washer or tightening a correctly fitted connection may resolve the issue.
However, persistent leakage, damaged fixing points, or a deteriorated cistern body may justify a full replacement. Always identify where the water is coming from before deciding which parts to change.
3. The Toilet Keeps Running After Flushing
A toilet that continues to run may have a faulty flush valve seal, a fill valve that does not shut off correctly, or a float mechanism set at the wrong level. These components can often be repaired or replaced separately.
If the cistern is old, damaged, or difficult to source compatible parts for, replacing the complete unit may be worth considering.
4. The Cistern Does Not Refill Properly
Slow filling or a cistern that does not refill at all may result from a restricted water supply, a faulty fill valve, or a problem with the float mechanism. Check the supply valve and identify whether the fault is isolated to the inlet mechanism before replacing the cistern.
5. You Are Updating the Bathroom
A bathroom renovation may provide an opportunity to replace an outdated cistern with a model that suits the new design. For example, you might be updating the sanitaryware, changing the cistern style, or selecting a compatible dual-flush system.
Before making a change, check whether the new cistern will work with your existing toilet pan, flush connection, water inlet and fixing arrangement.
Types of Toilet Cisterns
Identifying your cistern type is an important first step because the fixing method and connections can vary.
Close-Coupled Cisterns
A close-coupled cistern sits directly on the toilet pan, creating a compact, integrated unit. This is a common arrangement in modern UK bathrooms. The cistern is typically secured to the pan with bolts and sealed at the flush outlet.
When replacing this type, you need to check the cistern's dimensions, fixing positions and compatibility with the existing pan. A cistern that looks similar may not fit correctly if the bolt holes or outlet arrangement differ.
Low-Level Cisterns
A low-level cistern is mounted on the wall above the toilet pan and connected to it by a flush pipe. This arrangement leaves the cistern visible and separate from the pan.
Replacement requires the new cistern to work with the flush pipe, wall fixings and existing toilet configuration. The height and position of the cistern can affect the pipe connection, so measure carefully before purchasing.
High-Level Cisterns
A high-level cistern is mounted higher on the wall, usually with a longer flush pipe connecting it to the toilet pan. Some traditional designs use a pull chain or lever.
These installations may involve higher mounting positions, older pipework and specialist fittings. If the support brackets, wall structure or pipe connections need changing, professional installation is advisable.
Concealed Cisterns
A concealed cistern is installed behind a wall, within a service void, or inside bathroom furniture. Only the flush plate or operating mechanism may be visible.
Replacing a concealed cistern can be more involved because access may be restricted. Some models allow servicing through the flush-plate opening, while others require part of the surrounding structure to be opened. Check the manufacturer's access and maintenance instructions before starting.
For a like-for-like replacement, identify the exact model where possible and confirm that the new unit will fit the existing frame or housing.
Tools and Materials You Will Need
Gather the necessary tools and replacement parts before disconnecting the existing cistern. Having everything ready can reduce the time the toilet is out of use and help prevent avoidable mistakes.
| Tool or Material | Purpose |
|---|---|
| Adjustable spanner | Loosening and tightening suitable nuts and water connections. |
| Screwdrivers | Removing screws, operating some isolation valves and releasing fittings. |
| Bucket or shallow container | Collecting residual water. |
| Old towels and sponge | Soaking up water and keeping the work area dry. |
| Protective gloves | Improving hygiene while handling used toilet components. |
| Replacement cistern | The new tank, compatible with the existing toilet arrangement. |
| Replacement fixing bolts and washers | Securing the cistern and renewing worn seals. |
| Suitable inlet connector or washer | Reconnecting the water supply where required. |
| Flush outlet seal or close-coupling kit | Sealing the connection between the cistern and pan, where applicable. |
| Spirit level | Checking that the cistern is correctly aligned. |
| Manufacturer's installation instructions | Confirming the correct fittings, assembly sequence and tightening requirements. |
You may not need every item listed. The exact requirements depend on your cistern type and whether the replacement comes with its own fittings.
Avoid assuming that old bolts, washers or seals can be reused. Inspect them carefully and replace worn, corroded, deformed or damaged components with compatible parts.
What to Check Before Buying a Replacement
Choosing the correct replacement cistern is just as important as fitting it correctly. Before purchasing, inspect the existing installation and record its key measurements and connection details.
Measure the Existing Cistern
Measure the width, height and depth of the current cistern. For a close-coupled model, also check the shape of the pan's cistern platform and the position of the fixing holes.
Measurements should be taken carefully rather than estimated from photographs. Compare them with the replacement product's technical drawing and installation instructions.
Check the Flush Outlet
The outlet connects the cistern's flushing mechanism to the toilet pan or flush pipe. Its position, size and sealing arrangement must be compatible with the replacement.
For close-coupled toilets, check whether the replacement requires a particular close-coupling kit or flush outlet seal. For low-level and high-level systems, confirm that the flush pipe and connector can be fitted correctly.
Identify the Water Inlet Position
Cisterns may have a bottom-entry or side-entry water supply. Identify where the existing supply enters the tank and check whether the replacement supports the same arrangement.
If the inlet position differs, the pipework or connector may need to be adapted. Do not force a connector into place or use a makeshift arrangement to compensate for an incompatible fitting.
Check the Fixing Arrangement
Look at how the cistern is secured to the toilet pan, wall or supporting frame. The replacement must be suitable for that arrangement, or the fixing method must be changed using an appropriate installation plan.
For wall-mounted cisterns, the wall and brackets must safely support the unit when full. Do not rely on unsuitable fixings or assume that existing wall anchors are appropriate for a heavier replacement.
Consider the Flush Mechanism
Some cisterns use a lever, while others use a push button or dual-flush control. Check whether the operating mechanism is included and whether it is compatible with the cistern and toilet pan.
A dual-flush mechanism can offer different flush volumes, but the cistern must be designed for the mechanism and adjusted according to the manufacturer's instructions.
How to Change a Toilet Cistern: Step-by-Step
The following process is intended for a standard, accessible cistern where the replacement is compatible with the existing toilet. The exact fixing method varies between models, so always follow the instructions supplied with the new cistern.
Step 1: Turn Off the Water Supply
Before removing any components, shut off the water feeding the toilet cistern. Look for an isolation valve on the supply pipe, usually close to the cistern. Depending on the valve design, it may be operated with a screwdriver or by turning a small handle.
Close the valve gently and do not force it if it is seized or damaged. If there is no suitable isolation valve, you may need to turn off the property's main water supply at the stopcock.
Once the supply is off, flush the toilet. The cistern should empty without refilling. If water continues to enter, the supply may not be fully isolated.
Important: If the valve is stuck, the pipework is corroded, or you cannot stop the water reliably, pause the job and contact a plumber.
Step 2: Empty the Cistern Completely
Flushing removes most of the water, but a small amount usually remains at the bottom of the tank and around the internal fittings.
Use a sponge or old towel to absorb the remaining water and transfer it to a bucket. Keep additional towels close to the base of the toilet to catch drips when the supply connection is released.
If the cistern has a ceramic lid, lift it carefully and place it on a folded towel or another stable, protected surface. Ceramic lids can chip or crack if knocked against a hard surface.
Step 3: Photograph the Existing Connections
Before dismantling anything, take clear photographs of the cistern from the front, inside and underneath where accessible. Capture the water inlet, fixing bolts, flush mechanism and any connecting pipes.
These photographs can help you understand how the original assembly was arranged. They are particularly useful when several washers, nuts or brackets need to be removed.
If the existing fittings are unusual or you are unsure how they work, identify the model or consult its instructions before proceeding.
Step 4: Disconnect the Water Inlet
Place a bucket or shallow container under the water supply connection. Using a suitable spanner, carefully loosen the nut connecting the supply pipe or flexible connector to the cistern's fill valve.
Do not twist or put excessive force on the pipework. If the connector begins to rotate with the nut, stop and assess the connection rather than risking damage.
A small amount of residual water may escape when the connection is released. Allow it to drain into the container, then move the supply pipe safely out of the way.
Inspect the connector for corrosion, damaged threads, cracking or worn seals. Replace any unsuitable components before reconnecting the new cistern.
Step 5: Remove the Cistern Lid and Internal Fittings if Required
If the cistern has a push-button flush, the lid may be attached to the operating mechanism. Follow the manufacturer's instructions to release it without forcing the button or damaging the lid.
Some replacement cisterns are supplied with the flush and fill mechanisms already installed. Others require these components to be fitted separately.
If the internal fittings obstruct the removal process, disconnect them as directed by the manufacturer. Keep small parts together and note their original positions.
Step 6: Undo the Cistern Fixings
For a close-coupled cistern, the fixings usually secure the tank to the toilet pan. Depending on the model, you may need to access nuts underneath the cistern platform or behind the pan.
Support the cistern while loosening the fixings so it cannot shift unexpectedly. Remove the nuts, bolts and washers carefully. If the bolts are badly corroded or seized, do not apply excessive force that could crack the ceramic.
A wall-mounted cistern may also have brackets or screws securing it to the wall. Check how it is supported before removing any fixings.
For heavier ceramic cisterns, ask another person to help lift and handle the tank. Do not attempt to lift a heavy or awkward cistern from an unstable position.
Step 7: Lift Away the Old Cistern
Once the water inlet and fixings have been disconnected, lift the cistern away from the pan or wall supports. Keep it level to avoid spilling any residual water.
Place it on a stable, padded surface away from the work area. Ceramic can break if dropped or placed directly on hard flooring.
If the cistern does not lift free, stop and check for remaining fixings, sealant or connections. Do not lever it off the toilet pan with a screwdriver or another hard tool, as this can damage the ceramic.
Step 8: Clean and Inspect the Mounting Area
With the old cistern removed, inspect the area where it sat. Remove loose dirt and residue, then clean the surface so the new seals can sit correctly.
Check the toilet pan for cracks, damaged fixing holes or signs of water damage. Inspect the flush outlet and mounting points, along with any wall brackets or supporting frame.
Replace worn washers and damaged fittings rather than installing the new cistern on top of compromised components. If the pan is cracked or the mounting area is damaged, a simple cistern replacement may not be appropriate.
Avoid applying sealant indiscriminately to the flush outlet or internal fittings. Use only the seals and sealing methods specified by the manufacturer.
Step 9: Fit the New Cistern's Internal Mechanisms
If the replacement cistern does not come pre-assembled, install the fill valve, flush valve, seals and operating mechanism according to the supplied instructions.
Check that each washer is positioned correctly and that the components are aligned with the appropriate openings. Tighten the retaining nuts as directed, taking care not to overtighten plastic fittings or place excessive stress on ceramic surfaces.
Set the fill valve and float mechanism to the recommended water level. The correct setting varies by model, so use the manufacturer's marked waterline or installation guidance rather than relying on a universal measurement.
If the cistern uses a push button, check that the operating rods or cables are adjusted correctly and can move freely.
Step 10: Position and Secure the Replacement Cistern
Place the new cistern into position, ensuring that its outlet aligns with the toilet pan or flush pipe and that the fixing holes match the intended mounting points.
For a close-coupled installation, fit the specified outlet seal or close-coupling washer and position the fixing bolts and washers in the correct order. For wall-mounted models, follow the manufacturer's instructions for the brackets and wall fixings.
Use a spirit level where appropriate to check that the cistern is sitting straight. Tighten the fixings gradually and evenly so the tank is stable.
Do not overtighten the bolts. Ceramic cisterns and toilet pans can crack under excessive pressure. The aim is to achieve a secure, correctly aligned fit, not to force the components together.
If the new cistern does not sit naturally in position, check the dimensions and compatibility rather than forcing it to fit.
Step 11: Reconnect the Water Supply
Reconnect the inlet pipe or flexible connector to the fill valve, making sure that the correct washers and sealing components are in place.
Start the connection carefully to avoid cross-threading. Tighten it according to the fitting instructions and use a suitable spanner only where required.
Do not assume that every threaded connection needs PTFE tape. Many toilet inlet connections seal with a washer rather than the threads themselves. Follow the connector manufacturer's instructions and avoid adding materials that could interfere with the intended seal.
Before restoring the water, check that the supply connection is straight, secure and free from visible damage.
Step 12: Restore the Water Supply and Allow the Cistern to Fill
Open the isolation valve slowly and watch the inlet connection as the cistern begins to fill. Check for drips around the supply fitting, fill valve and base of the cistern.
Allow the cistern to fill to its intended water level. The fill valve should shut off automatically once the level is reached.
If water continues to enter after the cistern has filled, the float or fill valve may need adjustment, or the mechanism may be faulty. Follow the manufacturer's instructions to correct the setting.
If water leaks from a connection, shut off the supply before attempting to inspect or adjust it.
Step 13: Test the Flush Mechanism
Once the cistern has filled and the connections appear dry, operate the flush. Check that the mechanism activates correctly and that water flows into the toilet pan as intended.
Allow the cistern to refill and repeat the test several times. Observe whether the flush button or lever returns to its normal position and whether the fill valve stops running.
Check the joint between the cistern and toilet pan, the water inlet connection, and the area underneath the tank. Dry surfaces make it easier to spot new drips.
If the cistern leaks, does not refill correctly or continues to run, do not assume the problem will resolve itself. Isolate the water and identify the cause before using the toilet normally.
Step 14: Refit the Lid and Finish the Installation
When you are satisfied that the cistern is working correctly, refit the lid and ensure the flush button or lever operates freely.
Clean the surrounding area and remove any tools, packaging or residual water. Keep an eye on the installation over the next several uses, checking the floor and all accessible connections for signs of leakage.
If the cistern is wall-mounted, confirm that the unit remains stable and that the wall fixings show no signs of movement. If anything feels loose or water continues to appear, turn off the supply and seek professional advice.
How to Check for Leaks After Installation
A successful installation should leave the cistern stable, the water supply secure and the flush mechanism operating consistently. A careful check after fitting can help identify small problems before they cause damage.
- Water inlet: Check the connector and fill-valve entry point for drips while the cistern fills.
- Cistern base: Inspect the joint between the cistern and toilet pan, where applicable.
- Flush outlet: Look for water escaping around the flush connection after each flush.
- Fixing bolts: Check for moisture around the fixing points and confirm that the cistern does not move.
- Water level: Ensure the fill valve stops the incoming water at the correct level.
- Overflow: Confirm that water does not rise to the overflow level or continue running into the toilet pan.
- Flush operation: Test the mechanism several times to make sure it releases water and returns to its normal position.
If you find a leak, shut off the water supply before investigating. A loose connection, incorrectly positioned washer, damaged seal or incompatible fitting may be responsible. Do not continue tightening components if doing so could damage the ceramic or plastic parts.
Common Problems When Replacing a Toilet Cistern
Even when the steps are followed carefully, a few problems can arise during installation.
The New Cistern Does Not Line Up with the Toilet Pan
This usually indicates a difference in dimensions, fixing-hole positions or outlet design. Check the product specifications and compare them with your existing installation. Do not force the cistern into place or use unsuitable bolts to compensate for misaligned holes.
The Cistern Leaks from Underneath
Water beneath the cistern may be coming from the inlet connection, flush outlet seal or fixing bolts. Dry the area and observe where the water first appears. Isolate the supply before dismantling or adjusting the relevant connection.
The Toilet Continues to Run
A continuous flow into the pan may indicate a flush valve seal that is not closing properly or a fill valve that is not shutting off. Check that the float can move freely and that the flush mechanism is correctly fitted and adjusted.
The Cistern Fills Too Slowly
A slow refill can result from a restricted supply, a partially closed isolation valve or a problem with the fill valve. Check the water supply first. If the valve is faulty or the pipework is restricted, the affected component may need attention.
The Fixing Bolts Are Seized
Old metal fixings can corrode and become difficult to remove. Applying excessive force may crack the cistern or pan. If the fixings cannot be released safely with suitable tools, ask a plumber to remove them.
The Concealed Cistern Is Difficult to Access
Concealed installations can require specialist access procedures. Do not break into tiled walls or remove bathroom furniture without checking how the cistern is designed to be serviced. Consult the product instructions or use a qualified professional if access is unclear.
Can You Replace a Toilet Cistern Yourself?
Replacing a standard, accessible cistern may be suitable for someone with good DIY skills, provided the new unit is compatible and the water supply can be isolated safely. The task involves lifting components, disconnecting plumbing connections, handling seals and ensuring that the finished installation does not leak.
A professional plumber is the safer choice if the cistern is concealed, the pipework needs alteration, the isolation valve is faulty, or the existing fittings are badly corroded. Professional assistance is also advisable when the wall support needs changing or the replacement is not a straightforward like-for-like installation.
Stop if you cannot isolate the water, find unexpected pipework, discover damaged ceramic, or are unsure how the new fittings should be installed. A small mistake can lead to water damage, so it is better to resolve uncertainty before reconnecting the supply.
Always follow the product instructions and applicable local requirements. Where the work involves changes beyond a simple replacement, check whether additional plumbing or building requirements apply.
How to Maintain Your Toilet Cistern
Regular checks can help keep your cistern working properly and may reduce the likelihood of unexpected leaks or flushing problems.
Check for Running Water
Listen for water continuing to enter the cistern after flushing. If the toilet keeps running, inspect the fill and flush mechanisms to identify whether a valve or seal needs attention.
Look for Signs of Leakage
Check around the cistern base, inlet connection and visible pipework. Water marks, dampness or recurring drips can indicate a problem that should be addressed promptly.
Keep the Mechanism Clean
Follow the manufacturer's cleaning and maintenance recommendations. Avoid using harsh chemicals or unsuitable cleaning products inside the cistern, as they may damage seals or internal components.
Inspect the Flush Button or Lever
Make sure the operating mechanism moves freely and returns to its normal position. If the button sticks or the flush is inconsistent, check the mechanism and adjust it according to the manufacturer's instructions.
Address Small Problems Early
A worn washer or faulty fill valve may be simpler to replace than a complete cistern. Identifying the cause early can help prevent wasted water and protect the surrounding bathroom surfaces.
Frequently Asked Questions
1. Can I change a toilet cistern without replacing the toilet pan?
Yes, in many cases. If the toilet pan is in good condition and a compatible cistern is available, you may be able to replace the cistern alone. Check the fixing positions, flush outlet, dimensions and connection type before buying the replacement.
2. How long does it take to change a toilet cistern?
A straightforward, like-for-like replacement may take a few hours, depending on your experience, the type of cistern and the condition of the existing fixings. Concealed cisterns, seized bolts or changes to the pipework can make the job considerably more involved.
3. Do I need to turn off the mains water to replace a cistern?
Not necessarily. If the toilet has a working isolation valve on its water supply, you can usually turn off the cistern locally. If there is no isolation valve, or it does not stop the flow, you may need to shut off the main water supply before proceeding.
4. Can I replace a concealed toilet cistern myself?
It depends on the design and access available. Some concealed cisterns are designed to be serviced through the flush-plate opening, while others are more difficult to reach. If replacing the unit requires opening a wall, changing pipework or altering a support frame, professional installation is recommended.
5. Why is my new toilet cistern leaking?
Possible causes include a misaligned washer, a loose or incorrectly fitted connector, a damaged seal, or incompatible fittings. Dry the area to locate the source of the leak, then turn off the water before making any adjustments. Follow the manufacturer's instructions and avoid overtightening fittings.
6. Should I replace the internal fittings when changing the cistern?
If the new cistern is supplied with a compatible flush valve and fill valve, fitting the supplied components may be the simplest approach. If you are reusing existing mechanisms, confirm that they are compatible with the new tank and are in good condition. Replace worn seals or faulty components rather than reinstalling them by default.
7. Can I fit a dual-flush mechanism to an existing cistern?
Only if the cistern is designed to accommodate the mechanism and the flush outlet and operating arrangement are compatible. Check the manufacturer's specifications before purchasing a dual-flush conversion kit. A mechanism that does not fit correctly may cause poor flushing or leaks.
8. What should I do if the cistern will not stop filling?
Check whether the float can move freely and whether the fill valve is adjusted correctly. If water continues to enter despite the cistern reaching its intended level, the fill valve may be faulty. Shut off the supply if the water level is rising excessively or the cistern is overflowing, then repair or replace the affected component.
9. Do I need a new seal when replacing a cistern?
It is generally sensible to use the new seals supplied with the replacement or an appropriate compatible sealing kit. Old rubber washers may have hardened, flattened or deteriorated over time. The correct seal depends on the cistern design and the connection being made.
10. When should I call a plumber?
Contact a plumber if you cannot isolate the water supply, the pipework is damaged or corroded, the cistern is concealed and difficult to access, the fixings are seized, or the new cistern does not align with the existing pan. Professional help is also advisable if you are uncertain about the installation or cannot resolve a leak safely.
Final Thoughts
Changing a toilet cistern can be a practical way to address a cracked tank, persistent leakage or an outdated installation without replacing the entire toilet. Success depends on selecting a compatible cistern, preparing the work area, isolating the water supply and fitting each connection and seal correctly.
Take time to measure the existing installation, inspect the condition of the toilet pan and check the manufacturer's instructions before starting. Once the replacement is fitted, test the water inlet, flush mechanism, outlet seal and fixing points carefully, and monitor the area for leaks.
If your bathroom upgrade involves a different cistern configuration, concealed plumbing or damaged fittings, professional advice can help ensure that the installation is safe and reliable. With the right preparation and attention to detail, you can make an informed decision about whether a cistern replacement is suitable for your bathroom.


