
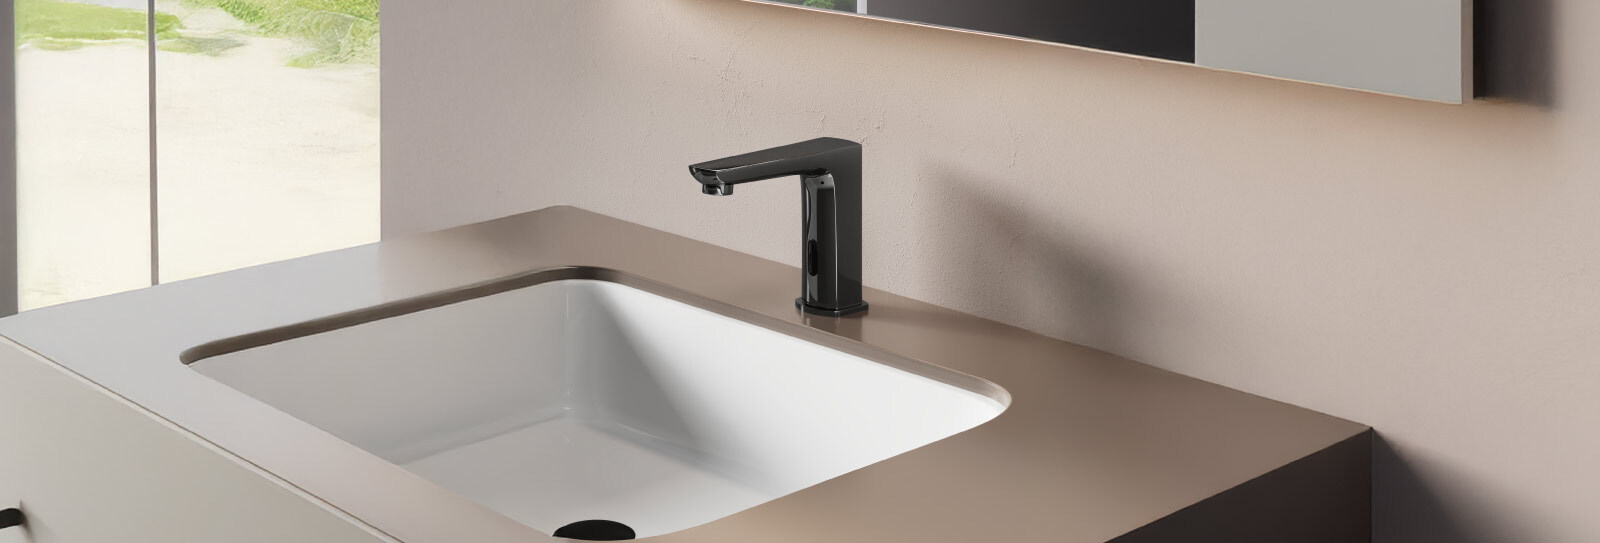
Bathroom taps are among the most frequently used fittings in any home. From washing your hands in the morning to cleaning your face before bed, they are constantly exposed to water, soap, toothpaste, skincare products and everyday handling. Over time, this can leave behind water spots, limescale, soap residue and fingerprints that make even a well-designed bathroom look less cared for.
The good news is that keeping taps clean does not require expensive products or an elaborate cleaning routine. With the right materials, a gentle approach and a little consistency, you can remove everyday marks, reduce limescale build-up and maintain the appearance of your bathroom fittings.
However, how to clean taps properly depends on more than the type of dirt you are trying to remove. The finish matters too. Polished chrome, matt black and coloured metallic finishes may have different care requirements, so a cleaning method that works for one tap should not automatically be used on another.
This guide explains how to clean bathroom taps step by step, remove stubborn water stains, tackle limescale safely, care for different tap finishes and avoid common mistakes that could damage the surface.
Why Is Regular Tap Cleaning Important?
Bathroom taps are exposed to moisture throughout the day. Each time water splashes onto the surface and evaporates, it can leave behind minerals and other residue. When this happens repeatedly, small spots may develop into more noticeable deposits.
Regular cleaning helps address these issues before they become difficult to remove.
1. Prevents water spots and mineral deposits
Water contains naturally occurring minerals, including calcium and magnesium. When hard water evaporates from a tap, these minerals can remain on the surface as pale marks or chalky deposits.
Over time, the deposits may become more noticeable around the base of the spout, the tap handle and the area where water collects.
Wiping the tap dry after use helps reduce the amount of residue left behind.
2. Keeps the bathroom looking well maintained
Taps are small fittings, but they can have a noticeable effect on the overall appearance of a bathroom. Water marks, fingerprints and soap residue can make a basin area appear untidy even when the surrounding surfaces are clean.
A quick wipe can help maintain a neat appearance without requiring a full bathroom clean every day.
3. Helps preserve the tap finish
Cleaning removes substances that accumulate during normal use. More importantly, using suitable cleaning methods helps avoid unnecessary wear to the visible finish.
Abrasive pads, harsh chemicals and prolonged exposure to unsuitable cleaning products can damage certain finishes. Gentle, regular care is generally preferable to aggressive cleaning after deposits have built up.
4. Makes deeper cleaning easier
Fresh water marks and light soap residue are usually easier to remove than deposits that have accumulated over several weeks.
A simple maintenance routine reduces the need for intensive scrubbing and helps keep the tap easier to clean over time.
If you are choosing fittings for a new bathroom or planning an update, explore the taps category for different tap styles and finishes.
What You Need to Clean Bathroom Taps
Before starting, gather a few basic cleaning materials. You do not need a large collection of specialist products for routine maintenance.
| Cleaning material | What it is used for |
|---|---|
| Soft microfibre cloth | Wiping the tap and removing fingerprints |
| Warm water | Loosening everyday dirt and soap residue |
| Mild, pH-neutral soap or cleaner | Cleaning general surface grime, if permitted by the manufacturer |
| Soft-bristled brush | Reaching around the base and other narrow areas |
| Clean, dry cloth | Drying and polishing the surface gently |
| Manufacturer-approved limescale cleaner | Removing mineral deposits when necessary and suitable for the finish |
Always check the care instructions supplied with your tap before using a cleaning product. If the manufacturer specifies particular products or restrictions, follow that guidance.
Avoid assuming that a household remedy is safe simply because it is commonly recommended online. Vinegar, lemon juice and other acidic substances can damage some tap finishes, particularly if left on the surface.
How to Clean Bathroom Taps Step by Step
For most routine cleaning, a soft cloth and warm water are a sensible starting point. The aim is to remove dirt without scratching the finish or exposing it to unnecessary chemicals.
Step 1: Remove loose dirt and surface residue
Begin by lightly wetting a soft microfibre cloth with warm water.
Wipe the spout, handle, sides and visible base of the tap to remove loose dust, toothpaste splashes, soap residue and fingerprints.
Avoid using a rough sponge or scouring pad, even if the tap appears durable. Small scratches can affect the appearance of polished and coated surfaces.
If the tap has several handles or decorative details, clean each section gently rather than applying excessive pressure to the whole fitting.
Step 2: Use a suitable mild cleaner if needed
If water alone does not remove the marks, use a small amount of mild, pH-neutral soap or a cleaner approved for the tap's specific finish.
Apply the cleaner to the cloth rather than spraying it directly onto the tap. This helps limit overspray onto nearby surfaces and reduces the chance of cleaner collecting around joints or openings.
Gently wipe the affected areas. There is usually no need to scrub repeatedly or apply strong chemicals to remove ordinary bathroom grime.
Do not mix cleaning products. Combining household cleaners can create hazardous reactions, and different formulations may be unsuitable for the tap's surface.
Step 3: Clean around the tap base
The area where a tap meets the basin often collects water, soap residue and mineral deposits. It can also be difficult to reach with a larger cloth.
Use a soft-bristled brush or the corner of a damp cloth to clean around the base and other narrow gaps.
Work carefully around the mounting area. Avoid forcing tools into openings or disturbing seals and connections.
If you notice persistent moisture around the base, check whether it is simply leftover splash water or whether there may be a leak that needs attention.
Step 4: Rinse away cleaning residue
Use a separate cloth dampened with clean water to remove any remaining soap or cleaning solution.
This step is important because residue left on the surface can create streaks or marks as it dries.
Do not leave a cleaning product on the tap longer than its instructions permit. If the product requires rinsing, rinse thoroughly.
Step 5: Dry the tap completely
Use a clean, dry microfibre cloth to remove moisture from the spout, handle and base.
Drying is particularly useful in bathrooms where hard water leaves visible marks. It reduces the amount of water that can evaporate on the surface and deposit minerals.
Finish with light, even strokes. Avoid polishing aggressively, especially on matt, brushed or coated finishes.
Step 6: Check the result
Look at the tap from different angles to identify remaining spots, streaks or deposits.
If a mark remains, do not immediately reach for a stronger cleaner. First establish whether it is ordinary residue, limescale or possible damage to the finish.
If the mark cannot be removed with a suitable gentle cleaning method, consult the tap manufacturer's care guidance before proceeding.
How to Remove Water Stains from Bathroom Taps
Water stains are among the most common reasons taps lose their clean appearance. They usually appear as pale spots, cloudy patches or streaks around the spout and handle.
The simplest approach is to clean the area gently and dry it thoroughly.
For fresh water spots
Fresh marks often come away with a damp microfibre cloth.
- Dampen the cloth with clean water.
- Wipe the affected area gently.
- Remove any remaining residue with a clean, damp cloth.
- Dry the tap with a separate cloth.
Avoid rubbing the surface with a dry, rough towel, as this may create scratches or streaks.
For recurring water marks
If water spots return quickly, consider whether water is regularly splashing onto the tap or remaining around the base after use.
A few simple changes can help:
- Wipe the tap after cleaning the basin.
- Avoid leaving wet cloths draped over the fitting.
- Check that the tap outlet is positioned appropriately over the basin to minimise unnecessary splashing.
- Dry the surrounding surface where water tends to collect.
If your bathroom has hard water, mineral deposits may return despite regular cleaning. Consistent maintenance can help manage them, although it cannot change the mineral content of the water itself.
How to Remove Limescale from Taps
Limescale forms when minerals in hard water accumulate on a surface. It often appears as a white, chalky deposit around the spout, handle joints, tap base or aerator.
Although limescale can be stubborn, it is important to remove it without damaging the tap finish.
Step 1: Identify where the limescale has formed
Inspect the tap carefully. Mineral deposits commonly develop around areas where water collects or evaporates slowly.
Check the underside of the spout, the edges of the handle and the point where the tap meets the basin.
If deposits are concentrated around the water outlet, the aerator may also need attention.
Step 2: Start with gentle cleaning
Dampen a soft cloth with warm water and place it against the affected area briefly to help soften the deposit.
Wipe gently and see whether the limescale begins to loosen.
Do not scrape deposits away with a knife, metal tool or other hard object. These can scratch the finish.
Step 3: Use only a compatible limescale remover
If the deposit remains, check the manufacturer's care instructions for an approved limescale remover suitable for your particular tap finish.
Follow the product's directions precisely, including any contact-time limits and rinsing instructions. Do not leave a product on the tap longer than recommended.
Some cleaners are acidic, and acidic products can damage particular coatings and decorative finishes. If the care instructions do not confirm that a product is suitable, do not use it.
Step 4: Rinse and dry thoroughly
Once the deposit has been removed, rinse away all cleaner residue and dry the surface completely.
If the limescale is extensive or does not respond to an approved method, seek advice from the manufacturer or a qualified professional rather than using increasingly abrasive techniques.
Important: Vinegar and lemon juice are frequently suggested for limescale removal, but they are not universally safe for bathroom taps. Do not use them unless the care instructions for your specific tap explicitly permit them.
How to Clean Different Tap Finishes
Not all bathroom taps have the same surface. The finish influences their appearance and may affect which cleaning products are appropriate.
The safest rule is to follow the instructions for the exact tap model and finish.
1. How to clean chrome taps
Chrome taps with a polished chrome finish can show fingerprints, water spots and streaks, especially under bright bathroom lighting.
For routine care:
- Wipe the surface with a soft, damp microfibre cloth.
- Use a suitable mild cleaner if necessary.
- Rinse away residue.
- Dry with a clean cloth to help restore an even appearance.
Avoid scouring pads, abrasive powders and harsh chemicals. These can scratch the surface or affect its finish.
For a coordinated bathroom design, you can explore the Jaquar taps sub-category, which includes chrome options across selected ranges.
2. How to clean matt black taps
Matt black taps create a distinctive contrast in contemporary bathrooms, but visible water marks and residue can stand out against the darker surface.
Use a soft cloth, clean water and a suitable mild cleaner where permitted. Rinse thoroughly and dry gently.
Avoid polishing the surface vigorously in an attempt to create shine. A matt finish is intended to have a different appearance from polished chrome, and aggressive rubbing may create uneven patches.
Do not use abrasive sponges, scouring powders or unapproved acidic cleaners.
3. How to clean brushed or metallic finishes
Brushed finishes have a textured visual appearance, while selected metallic finishes may use decorative coatings or specialised surface treatments.
Clean these taps with a soft cloth and a product confirmed as suitable for the specific finish.
If the surface has a visible grain, follow the manufacturer's cleaning advice on wiping direction. Avoid harsh scrubbing, as it can affect the consistency of the appearance.
Never assume that a cleaner suitable for chrome is automatically appropriate for brass, bronze, copper or other coloured finishes.
4. How to clean gold-coloured taps
Gold-coloured taps can have different surface treatments depending on the product. Their care requirements may therefore vary.
Use a gentle cleaning method approved for the particular finish. Avoid abrasive materials and do not use acidic household remedies unless specifically permitted by the manufacturer.
After cleaning, remove all residue and dry the tap carefully.
If you are unsure which cleaner is safe, consult the product documentation before proceeding.
5. How to clean taps with specialist coatings
Some taps feature coatings designed to create a particular colour, texture or visual effect.
For these surfaces, the safest approach is to follow the product-specific instructions rather than relying on general advice for metal taps.
Do not use polish, solvents or strong chemical cleaners unless the manufacturer confirms they are suitable.
How to Clean the Tap Aerator
The aerator is the small component fitted at the water outlet of many taps. It helps shape the water flow and may contain a screen that can collect mineral deposits or debris over time.
If your tap's water flow becomes uneven or starts splashing unexpectedly, a dirty or obstructed aerator may be one possible cause.
How to clean it safely
First, check the manufacturer's instructions to establish whether the aerator is removable and how it should be accessed.
If it is designed to be removed by the user:
- Follow the product instructions for removing the aerator.
- Inspect the component for visible debris and mineral deposits.
- Clean it using the method recommended for that component.
- Rinse it thoroughly.
- Refit it correctly, following the instructions.
Avoid using sharp tools that may damage the aerator or surrounding finish. Do not force a component that will not unscrew easily.
Some taps have integrated or specialised aerators that require a particular tool or service procedure. If you are unsure, consult the manufacturer's documentation or ask a qualified plumber for assistance.
Jaquar's UK tap range includes information about aerators and their role in shaping water flow. For details relevant to a specific fitting, refer to the product information available through the Jaquar UK taps collection.
How to Clean Around Tap Handles and Hard-to-Reach Areas
The visible spout is only one part of a tap. Dirt can also collect around the handle, joints, base and edges of decorative components.
These areas are easy to overlook during a quick clean.
Use a soft cloth folded into a small section so you can reach narrow spaces without introducing a rough edge. A soft-bristled brush can help loosen residue around joints, provided it is suitable for the finish.
Do not pour cleaning solution into the gaps between the handle and the body. Avoid forcing water into openings or dismantling the tap to reach concealed areas.
If you notice persistent grime that cannot be removed safely from the outside, consult the manufacturer's maintenance instructions before attempting further cleaning.
Common Mistakes to Avoid When Cleaning Taps
Using the wrong cleaning method can cause more problems than the original dirt. The following mistakes are worth avoiding.
Using abrasive sponges
Scouring pads and rough sponges may scratch or dull a tap's surface. Even when the damage is initially difficult to see, repeated abrasion can affect the finish.
Choose a soft microfibre cloth instead.
Applying strong chemicals without checking compatibility
Bleach-based cleaners, acidic descalers, solvents and other powerful products may be unsuitable for particular finishes.
Always check the product instructions and the tap manufacturer's guidance before use.
Never mix different cleaning products.
Leaving cleaner on the tap for too long
Longer contact does not necessarily mean better cleaning. Some products can affect a finish if they remain on it beyond the recommended period.
Follow the cleaner's directions and rinse as instructed.
Scraping away limescale
Using a blade, metal tool or hard object can scratch the tap and damage the surrounding surface.
Soften deposits with an approved method and remove them gently.
Forgetting to dry the tap
Even after cleaning, water left on the surface can dry into visible spots.
A quick wipe with a clean, dry cloth helps reduce this problem.
Using the same cleaning method for every finish
Chrome, matt black and decorative metallic finishes may have different requirements.
Always identify the finish before choosing a cleaning product.
How Often Should You Clean Bathroom Taps?
The ideal cleaning frequency depends on how often the tap is used, the hardness of the water and how quickly residue accumulates.
A practical routine is more useful than a rigid schedule.
| Frequency | Recommended care |
|---|---|
| After use, where practical | Wipe away obvious splashes and standing water |
| Daily or every few days | Give frequently used taps a quick wipe |
| Weekly | Clean the spout, handle, base and surrounding area thoroughly |
| When needed | Remove limescale using a compatible product and approved method |
| Periodically | Check the outlet and aerator if water flow becomes uneven |
These are general suggestions rather than manufacturer requirements. Adjust the routine to suit your bathroom and the care instructions for your tap.
If your home has hard water, more frequent wiping may help reduce visible mineral deposits. If the tap is used less often, a lighter routine may be sufficient.
How to Keep Bathroom Taps Cleaner for Longer
A few small habits can make routine maintenance easier.
Wipe away water after use
Water that remains on the tap can leave spots as it evaporates. Drying the surface helps reduce this residue.
Keep cleaning cloths soft and clean
A cloth containing grit or dried cleaning residue may scratch the finish. Use a clean, soft cloth and wash it regularly.
Clean the surrounding basin
Soap, toothpaste and skincare products can splash onto taps during everyday use. Cleaning the basin area helps prevent residue from transferring back onto the fitting.
For ideas on creating a coordinated washbasin area, explore the basins category.
Deal with deposits early
If you notice a pale ring around the base or chalky marks near the outlet, clean them promptly using a method approved for the finish.
Do not wait until the deposit becomes thick enough to require prolonged treatment.
Keep the tap's care instructions accessible
If you have several tap finishes in the same bathroom, keep the relevant product information available. This makes it easier to choose the right cleaning method and avoid accidentally using an unsuitable product.
When Cleaning Is Not Enough: Signs Your Tap May Need Attention
Not every problem on a tap is caused by dirt or limescale. Some issues may indicate wear, a damaged finish or a plumbing fault.
Consider seeking professional advice if you notice:
- Water continuing to drip after the tap is turned off.
- A handle that has become unusually stiff or difficult to operate.
- Persistent leaks around the base or connections.
- A finish that is peeling, flaking or showing signs of corrosion.
- Reduced or uneven water flow that remains after appropriate external cleaning.
- Deposits that cannot be removed without using products that may damage the finish.
Do not try to polish away peeling coatings or treat corrosion with abrasive materials. Cleaning cannot restore a finish that has been physically damaged.
If a tap is leaking or its operation has changed, a plumber or the manufacturer's service team can help identify the cause and recommend the appropriate repair.
Choosing Taps That Suit Your Bathroom and Maintenance Routine
Cleaning is easier when the tap is accessible and the chosen finish suits the way the bathroom is used.
When selecting new bathroom taps, consider the following factors:
The finish: Think about the visual effect you want and the maintenance instructions associated with the specific finish.
The installation: Deck-mounted and wall-mounted taps have different arrangements. Consider how easily the area around the fitting can be reached during routine cleaning.
The basin: Tap height, reach and outlet position should work with the basin to minimise unnecessary splashing.
The care instructions: Check the manufacturer's guidance before purchasing, particularly if you prefer a finish that needs specific maintenance.
The overall design: Coordinate the tap with the basin, shower fittings and other visible details without assuming every fitting needs to have an identical finish.
The Jaquar UK collection of showers can also be considered when coordinating fittings across a range of bathroom layouts. Reviewing individual product details can help you make a considered choice based on both appearance and practical requirements.
Frequently Asked Questions About Cleaning Taps
1. What is the best way to clean bathroom taps?
For routine cleaning, use a soft microfibre cloth dampened with warm water. If necessary, use a mild cleaner that is suitable for the specific tap finish. Rinse away residue and dry the surface with a clean cloth. Always follow the manufacturer's care instructions.
2. How do I make chrome taps shiny again?
Clean the tap gently with a soft, damp cloth and a suitable mild cleaner if needed. Rinse away residue and dry with a clean microfibre cloth. Avoid abrasive pads and harsh chemicals, which can scratch or damage the finish. If the surface remains dull after cleaning, check whether the finish itself may be damaged.
3. Can I use vinegar to clean taps?
Vinegar is acidic and is not suitable for every tap finish. It can damage certain coatings and decorative surfaces. Use it only if the manufacturer explicitly confirms that it is safe for your particular tap. Otherwise, choose a compatible cleaner recommended for the finish.
4. How do I remove limescale from bathroom taps?
Start by gently wiping the affected area with a soft cloth and warm water. If the deposit remains, use a limescale remover approved for your tap's finish and follow its instructions carefully. Rinse thoroughly and dry the surface. Never scrape limescale away with metal tools or use an unapproved acidic cleaner.
5. How can I clean matt black taps without leaving marks?
Use a soft cloth, clean water and a suitable mild cleaner where permitted by the manufacturer. Rinse away residue and dry the surface gently. Avoid abrasive sponges, aggressive polishing and unapproved chemicals, as these may affect the matt finish.
6. Why do my taps develop white marks after cleaning?
White marks often result from minerals left behind when water evaporates. Soap residue can also contribute to a cloudy appearance. Wiping the tap dry after cleaning and after use can help reduce recurring marks. In hard-water areas, some mineral deposits may return despite regular maintenance.
7. Can I use bleach on bathroom taps?
Do not assume bleach is safe for your taps. It may damage certain finishes or surrounding materials. Check the tap manufacturer's care instructions and the cleaner's label. A mild, compatible cleaner is generally a better starting point for routine cleaning.
8. How often should I clean my bathroom taps?
Frequently used taps benefit from a quick wipe every day or every few days, with a more thorough clean about once a week. You may need to clean more often if you have hard water or notice regular mineral deposits. Follow any product-specific maintenance instructions.
9. How do I clean the small holes at the end of a tap?
These openings are part of the water outlet or aerator. If the water flow becomes uneven, check the manufacturer's instructions to see whether the aerator can be removed and cleaned. Use the recommended method and avoid sharp tools or forcing components. If the aerator is integrated or difficult to access, consult a qualified professional.
10. What should I do if my tap still looks dull after cleaning?
First, confirm that all cleaning residue has been rinsed away and that the surface has been dried properly. If the dullness remains, the finish may have scratches, wear or other damage that ordinary cleaning cannot correct. Avoid stronger chemicals or abrasive polishing unless the manufacturer specifically recommends them.
Final Thoughts
Knowing how to clean taps is a simple but useful part of maintaining a bathroom. Regular wiping, gentle cleaning and thorough drying can help prevent everyday grime and water marks from becoming persistent problems.
The most important consideration is to match the cleaning method to the tap's finish. Warm water and a soft cloth are a sensible starting point, while stronger cleaners should be used only when they are confirmed as suitable for the particular product.
Avoid abrasive materials, unapproved acidic remedies and harsh chemicals. If limescale becomes stubborn or the tap develops a leak, persistent stiffness or visible finish damage, seek appropriate advice rather than trying increasingly aggressive cleaning methods.
With a consistent routine and the right care, bathroom taps can remain clean, presentable and ready for everyday use. For homeowners planning a bathroom update, the Jaquar UK taps collection offers a starting point for exploring different designs and finishes while considering the practical needs of the space.


